
Officialtollfree – Drawing a house can be a fulfilling endeavor, whether you’re an aspiring artist, an architecture enthusiast, or simply looking to express your creativity. It’s a skill that can be learned and honed over time, and with the right techniques, anyone can create a charming depiction of a house. In this comprehensive guide, we’ll break down the process step by step, from the initial sketch to the final touches.
Table of Contents
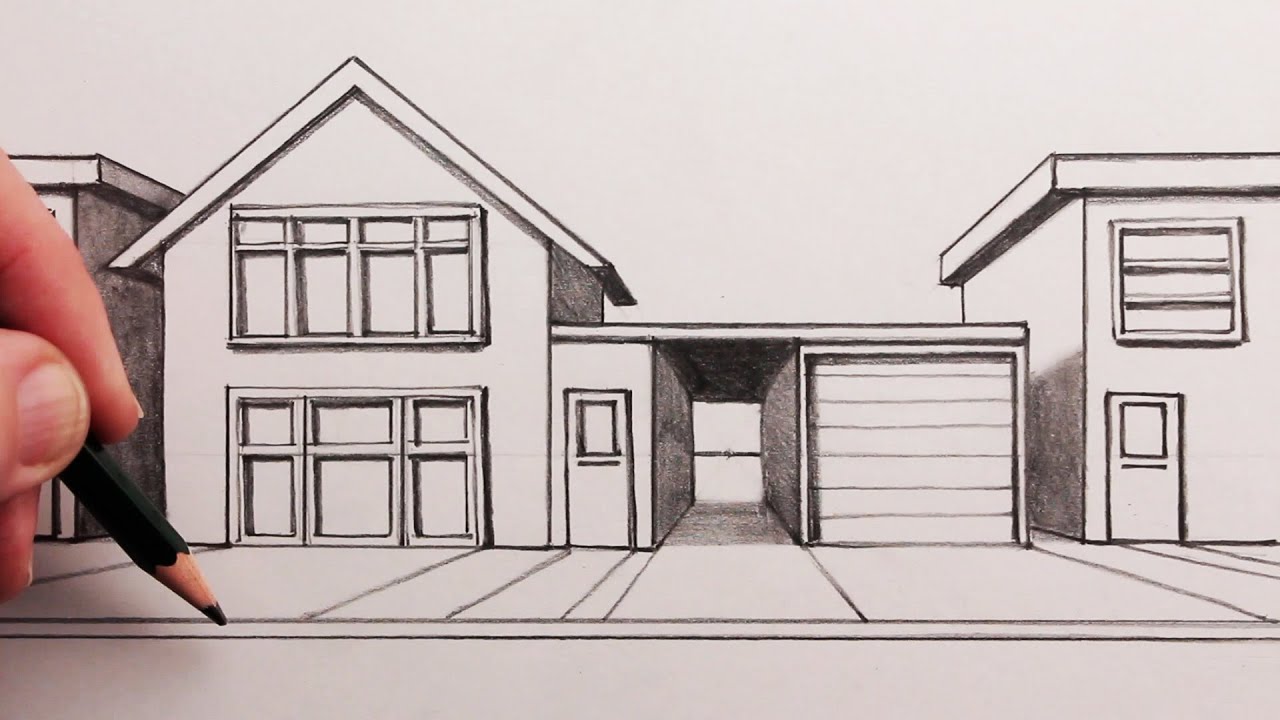
How to Draw a House
Step 1: Prepare Your Materials
Before you begin drawing, it’s essential to gather all the necessary materials. You’ll need a pencil, eraser, ruler, drawing paper, and optionally, colored pencils or markers for adding details later on. Find a comfortable workspace with good lighting where you can focus without distractions.
Step 2: Start with Basic Shapes
Begin by sketching the basic shapes that will form the foundation of your house. Use your pencil lightly, as these initial lines will serve as guidelines and may need to be erased later. Start with a rectangle for the main body of the house and add a smaller rectangle on top for the roof. You can also include additional elements like a chimney or porch if you’d like.
Step 3: Add Details
Once you have the basic outline of the house, it’s time to add some details. Use your ruler to draw straight lines for doors and windows, ensuring that they are evenly spaced and proportionate to the size of the house. You can also add a doorknob, windowpanes, and other small features to make your drawing more realistic.
Step 4: Create Depth and Texture
To give your drawing depth and texture, add shading and shadows. Determine where the light source is coming from and shade the areas of the house that would be in shadow accordingly. You can use cross-hatching or stippling techniques to create texture on the walls and roof. Don’t forget to add shading inside the windows and doors to make them appear recessed.
Step 5: Incorporate Landscaping
No house is complete without some landscaping around it. Draw trees, bushes, flowers, or a lawn to frame your house and give it a sense of place. You can also include a sidewalk, driveway, or garden path to add visual interest to your drawing and further enhance its realism.
Step 6: Final Touches
Once you’re satisfied with the overall composition of your drawing, go over it with darker lines to define the edges and add any final details. You can also use colored pencils or markers to add color to your drawing if desired. Don’t be afraid to experiment with different techniques and styles to make your drawing uniquely yours.
Step 7: Practice Regularly
Like any skill, drawing takes practice to master. Don’t be discouraged if your first few attempts don’t turn out as you’d hoped. Keep practicing, experimenting with different techniques, and seeking inspiration from other artists. Over time, you’ll develop your own style and become more confident in your abilities.
Drawing a house is a fun and rewarding activity that allows you to unleash your creativity and imagination. By following these steps and practicing regularly, you’ll soon be able to create charming and realistic depictions of houses that will impress your friends and family. So grab your pencil and paper, and start drawing your dream house today!
DA