Drawing a shark can seem like a daunting task, but with the right techniques and guidance, anyone can create a stunning shark illustration. Sharks are fascinating creatures with unique features, making them both challenging and rewarding subjects to draw. In this comprehensive guide, we will explore step-by-step instructions, tips, and tricks for drawing sharks of all shapes and sizes, allowing you to unleash your creativity and bring these majestic predators to life on paper.
Table of Contents
Understanding Shark Anatomy
Anatomy Overview:
Before diving into drawing, it’s essential to have a basic understanding of shark anatomy. Sharks have streamlined bodies, powerful tails, and distinctive features such as fins, gills, and sharp teeth. Familiarizing yourself with these characteristics will help you create a more realistic and accurate depiction of a shark.
Reference Materials:
Gathering reference materials such as photographs, illustrations, or videos of sharks can provide valuable insight into their appearance and movement. Study the anatomy, proportions, and details of different shark species to inform your drawing process.
Step-by-Step Guide to Drawing a Shark
Step 1: Sketching the Basic Shapes
- Start by sketching the basic shapes to outline the shark’s body. Use simple geometric shapes such as ovals, circles, and triangles to establish the overall form and proportions.
- Pay attention to the shark’s body posture and angle, as this will influence the dynamics of your drawing. Sharks are often depicted with a sleek, streamlined posture, reflecting their swift movement through the water.
Step 2: Adding Details and Features
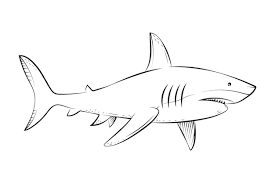
- Once you’ve established the basic shapes, begin adding details such as the shark’s fins, tail, and head.
- Sketch the dorsal fin on the shark’s back, followed by the pectoral fins on each side of the body. Add the caudal fin (tail fin) at the end of the body, emphasizing its powerful propulsion.
- Define the shark’s head by adding the mouth, eyes, and gill slits. Pay attention to the placement and size of these features to capture the characteristic appearance of a shark.
Step 3: Refining and Shading
- Refine the outlines and shapes of the shark, ensuring smooth transitions between different body parts and details.
- Use shading techniques such as hatching and cross-hatching to add depth and dimension to your drawing. Pay attention to light sources and shadows to create a three-dimensional effect.
- Experiment with different shading styles to enhance the texture and appearance of the shark’s skin, which is typically smooth and sleek.
Step 4: Adding Final Touches
- Take a step back and assess your drawing to identify any areas that may need further refinement or adjustment.
- Add any additional details or embellishments to enhance the overall composition and visual interest of your drawing.
- Consider adding a background or context to your drawing, such as underwater scenery or other marine life, to create a more immersive and dynamic composition.
Tips and Tricks for Drawing Sharks
- Study Shark Anatomy: Take the time to study photographs and illustrations of sharks to familiarize yourself with their anatomy and features.
- Practice Sketching: Sketching regularly will improve your drawing skills and confidence, allowing you to tackle more complex subjects like sharks with ease.
- Use Reference Materials: Refer to reference materials such as books, documentaries, and online resources to gather inspiration and guidance for your drawings.
- Experiment with Styles: Don’t be afraid to experiment with different drawing styles and techniques to find what works best for you. Whether realistic or stylized, there are endless possibilities for depicting sharks in art.
Common Mistakes to Avoid
- Overcomplicating Details: Avoid getting bogged down by unnecessary details, especially when starting. Focus on capturing the essential features and proportions of the shark.
- Ignoring Proportions: Pay attention to the proportions and relationships between different body parts to ensure a realistic and balanced drawing.
- Rushing the Process: Take your time and work methodically through each step of the drawing process. Rushing can lead to errors and inconsistencies in your final artwork.
Drawing a shark can be a challenging yet rewarding endeavor for artists of all skill levels. By following the step-by-step instructions, tips, and tricks outlined in this guide, you can learn to capture the grace, power, and beauty of these magnificent creatures on paper. Whether you’re a beginner or an experienced artist, drawing sharks offers an opportunity to hone your skills, explore your creativity, and gain a deeper appreciation for the wonders of the ocean. So, grab your pencils and paper, and embark on an artistic journey to master the art of drawing sharks!
SF